Outlook login and Autotask menu
BEFORE YOU BEGIN If you have not installed the Outlook Extension refer to Downloading and installing the MS Outlook Extension.
Logging in
For added security, Autotask requires that users either use two-factor authentication (2FA), single sign-on (SSO), or KaseyaOne unified login. This is true even when Autotask is accessed from Outlook. Any action that requires Outlook to access Autotask will open the log in page associated with your authentication method.
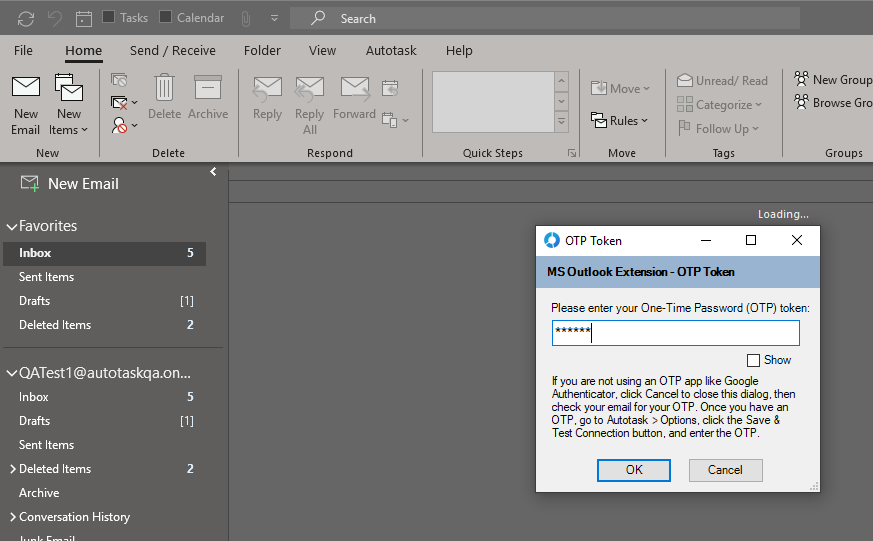
If you are using 2FA, the OTP (One Time Password) Token dialog will open every time you start Outlook, or when you return to Outlook after your current session has timed out.
To log in and access Autotask, do the following:
- Open Outlook. The OTP Token dialog window will open.
- Generate an authentication code for Autotask, and enter it into the dialog window.
- By default, the one time password is masked. Click Show to display the password.
- Click OK. For additional steps, refer to Login tab.
To log into Outlook without accessing Autotask:
- To quickly open Outlook to check or send email without entering a one time password, click Cancel to close the OTP Token dialog. Outlook will open, but will not connect to Autotask.
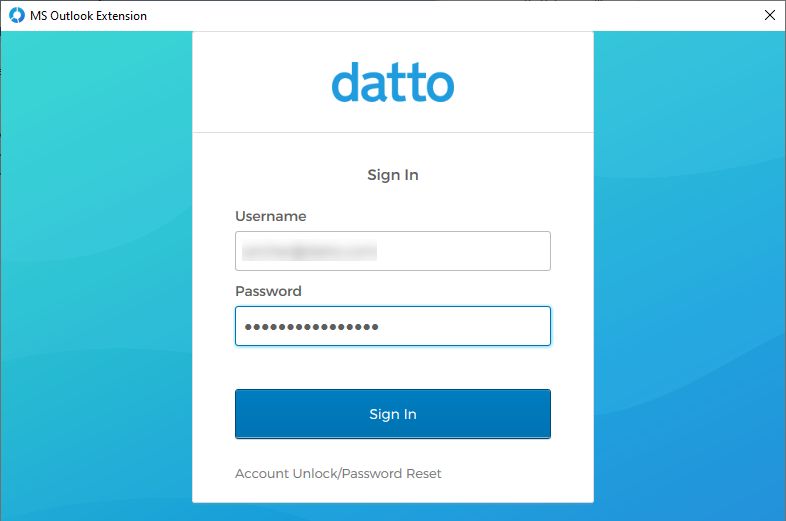
If you are using single sign-on (SSO) to log into Autotask, the authentication workflow will work as follows:
- If your Calendar or Contacts options are configured to automatically get contacts or calendar items when you open or close Outlook, access to Autotask is required, and you will be prompted to authenticate with your identity provider when opening or closing Outlook.

Refer to Configuring the Outlook extension. - If these settings are unchecked, you will not have to authenticate with your SSO provider, unless and until you select an option from the Outlook > Autotask menu. This allows you to open Outlook without unnecessary authentication.
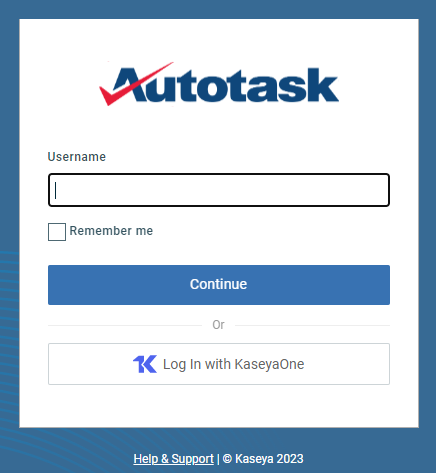
If your administrator has enabled log in with KaseyaOne, all Autotask users whose primary email address matches that of a user in KaseyaOne can log into Autotask using their KaseyaOne credentials. Using the KaseyaOne log in provides centralized access and seamless navigation to any other Kaseya modules where you have an account.
To use your KaseyaOne credentials, do the following:
-
Enter your Autotask Username and click Log In with KaseyaOne. You will be redirected to the KaseyaOne log in page.

-
Enter your credentials and authentication code. Autotask opens.
The app launcher icon appears in the top right corner. From there, you can easily navigate to any other connected Kaseya modules.
NOTE Users who log into Autotask using the unified log in will be logged out of KaseyaOne and all other modules when they log out of Autotask.
If you are running Outlook offline (without being connected to the Internet), any synchronization between Outlook and Autotask is automatically disabled to prevent the Autotask MS Outlook Extension from trying to connect with Autotask.
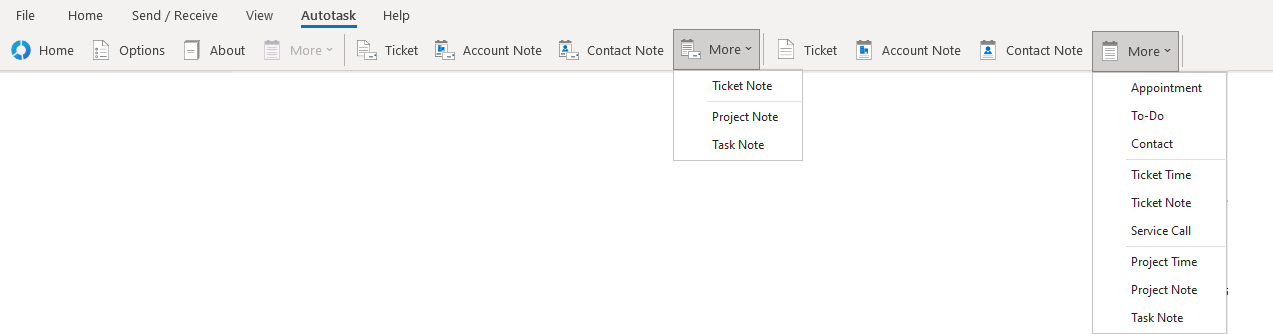
The Autotask menu in Outlook
After you have installed the Autotask MS Outlook Extension, an Autotask menu will appear at the top of your Outlook window in Mail, Calendar, and Contacts view. Click Autotask to view the menu.
Classic Ribbon:

Simplified Ribbon:
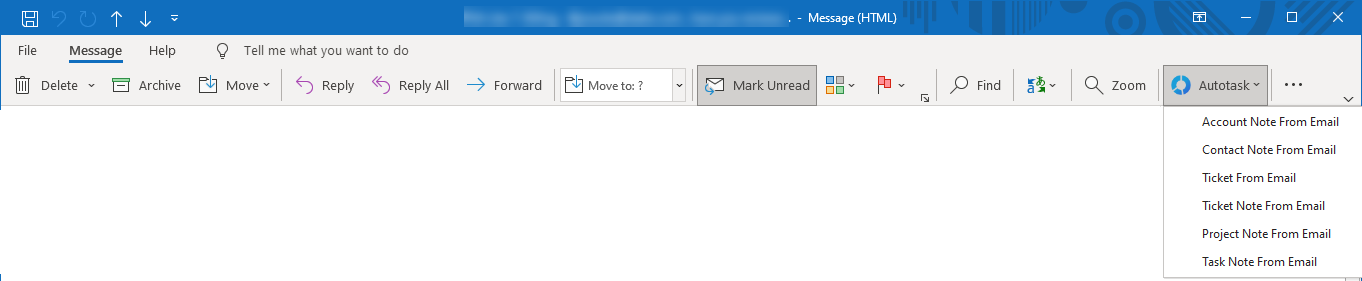
If you open an email message in a separate window, you will see the following menu:
On the Outlook > Autotask menu, pipes | divide the menu options into three groups:
| Menu Item | Option | Description |
|---|---|---|
|
Autotask |
||
|
Home |
|
Click to open your Autotask homepage. The Outlook Extension will pass your credentials to Autotask and log you in automatically. |
|
Options |
Click to open the window where you can enable and configure the Outlook Calendar and Contact integrations. Refer to Configuring the Outlook extension. |
|
|
About |
Click to display the version that you are using along with the Autotask Copyright notice. |
|
|
More |
Get Calendar Items |
Click to access a menu from which you can Get Calendar Items or Send Calendar Items from Outlook to Autotask. Refer to Transferring calendar items between Outlook and Autotask. |
|
Send Calendar Items |
||
|
Get Contacts |
Click to access a menu from which you can Get Contacts from Autotask, or Send Contacts from Outlook to Autotask. Refer to Transferring contacts between Outlook and Autotask. |
|
|
Send Contacts |
||
|
Create from email, Email message menu |
||
|
Ticket, Ticket From Email |
|
|
|
Company Note, Company Note From Email |
Saving an email as a CRM note, ticket note, project note, or task note |
|
|
Contact Note, Contact Note From Email |
Saving an email as a CRM note, ticket note, project note, or task note | |
|
More
|
Ticket Note, Ticket Note From Email |
Saving an email as a CRM note, ticket note, project note, or task note |
|
Project Note, Project Note From Email |
||
|
Task Note, Task Note From Email |
||
|
Add to Autotask |
||
|
Ticket |
|
Click to create a ticket in Autotask from the currently selected message in Outlook. Refer to Saving an email as a new ticket. |
|
Company Note |
Click to create an organization note in Autotask from the currently selected message. Refer to Creating new Autotask notes in Outlook. |
|
|
Contact Note |
Click to create a contact note in Autotask from the currently selected message. Refer to Creating new Autotask notes in Outlook. |
|
|
More |
Appointment |
|
|
To-Do |
||
|
Contact |
||
|
Ticket Time |
||
|
Ticket Note |
||
|
Service Call |
Creating new Autotask calendar items from Outlook NOTE This option requires that the Dispatch Calendar is enabled in Autotask, and you have Ticket View permission = All. |
|
|
Project Time |
||
|
Project Note |
Creating new Autotask notes in Outlook | |
|
Task Note |
Creating new Autotask notes in Outlook | |


