Adding a PageConnect/XPPS Printer as a device
About PageConnect/XPPS devices
The last step before you can import an XML file is to make sure that all printers for all customers that participate in the PageConnect/XPPS Managed Print Service program are installed as Devices of the Device Type "Xerox PageConnect/XPPS".
Unless there is a match for all printer serial numbers on the XML invoice in Autotask, the import will fail, and you will see the following error log table:
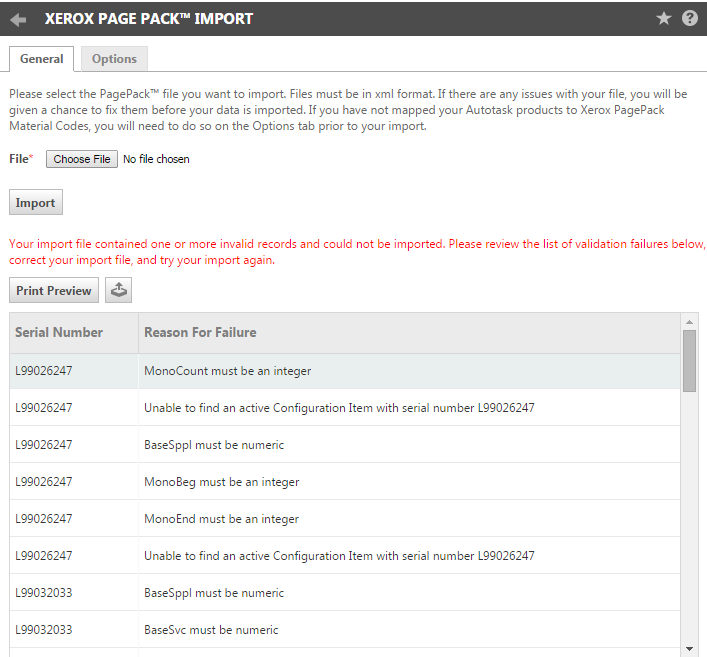
No records, not even the ones a match was found for, are imported.
You must locate the missing Devices on the XML file, and install them in Autotask.
TIP Best Practice: If you followed the workflow we suggested, the contract for billing the PageConnect/XPPS service already exists. We recommend that you install the Devices from the Contract > Devices page. This way, the Device will automatically be associated with the correct Organization and Contract. You will only need to select the Service used to bill the Base Price.
Installing a PageConnect/XPPS printer
- In the Contracts module, open the PageConnect/XPPS contract that will apply to the printer you are installing and select Devices from the Contract Menu. On the Devices page, click New.
The Device page opens on the General tab.
- In the Product field, start typing the printer name and then select the item from the drop-down list that appears when you start typing.
or
Click the Device selector icon to select a printer from your master product list. If you set up a Product Category for PageConnect/XPPS printers, they are displayed as folders and sub-folders in a menu, to make searching for specific products easier. - Select Xerox PageConnect/XPPS as the Device Category. If you do not select this Device Category, the import will succeed, but the printer data will not be tracked in Autotask.
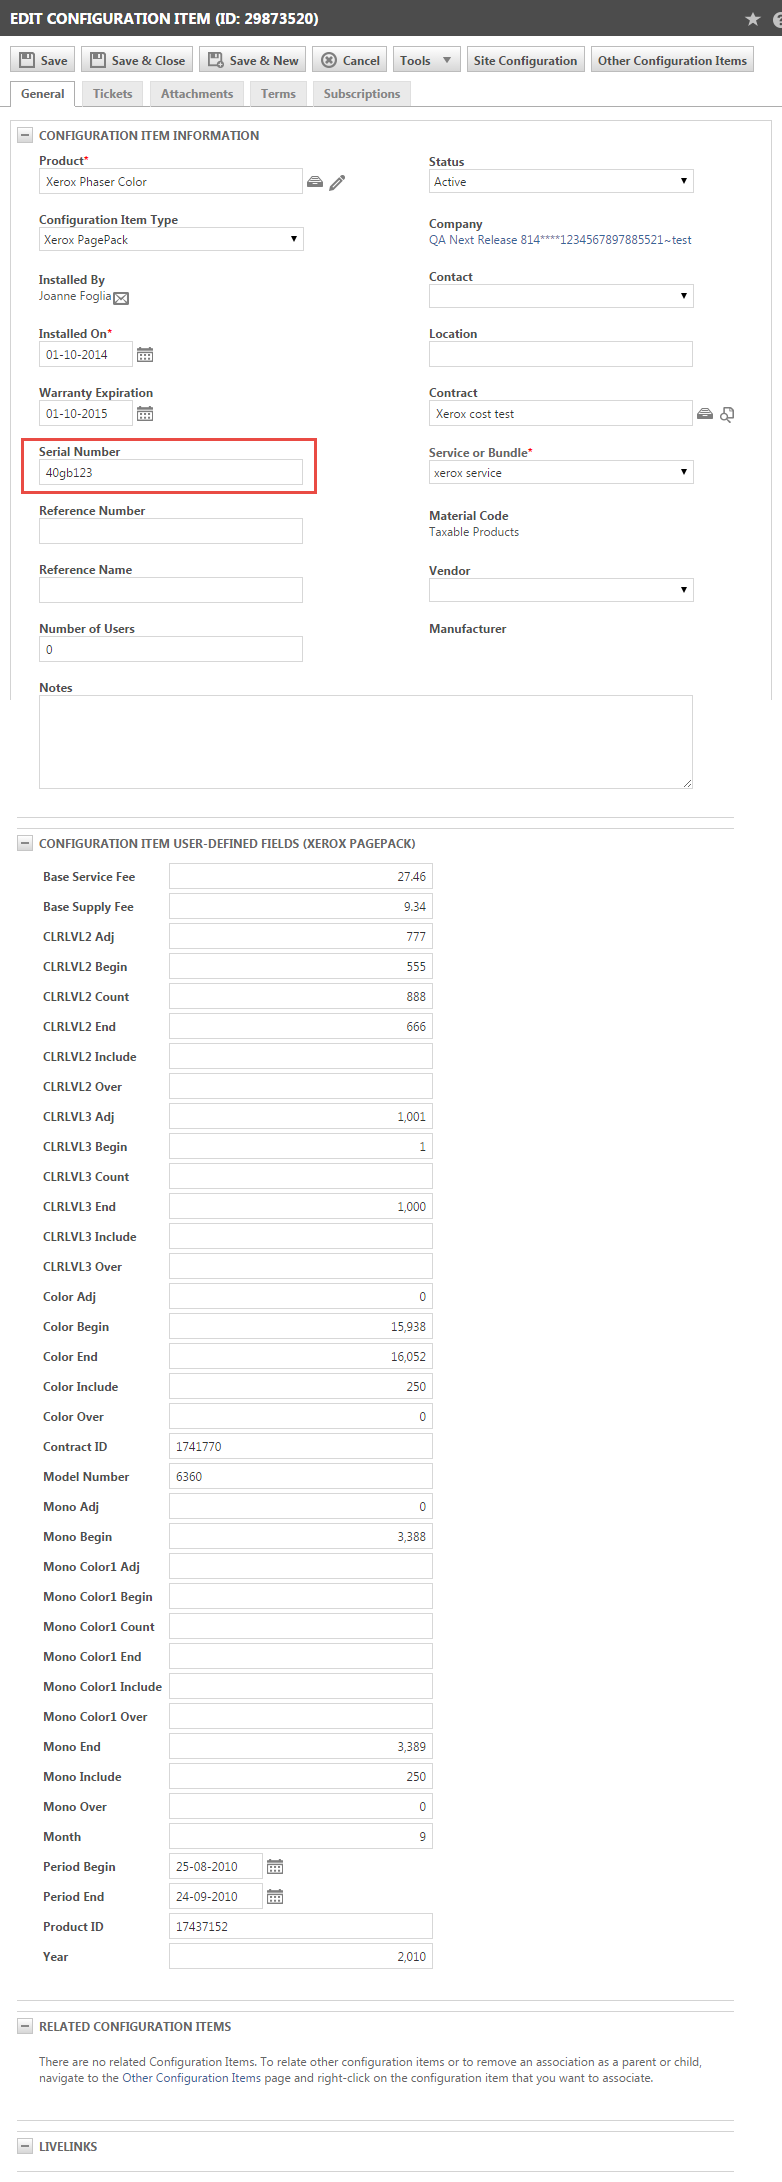
- Enter the Serial Number of the printer.
The serial number is required for the PageConnect/XPPS import. It is the key field that maps the imported data to the Autotask Device, and through that to the Organization, the Contracts, and the Service or Bundle used to bill the Base Price.
- The Status field defaults to Active. Do not change this setting or the import will fail.
- The Organization name is defaulted in and cannot be changed.
- The Contract Name is defaulted in but remains editable.
- Select the Service or Bundle that will be used to bill the Base Price for this printer. If you followed our Best Practice suggestions, the Service will contain the printer name, and selection should be easy.
- Populate or edit other fields as desired, then click Save. The printer is now installed to the organization and associated with the recurring service contract used to bill the base Price and to track the overage Costs.
- Repeat this step until you have entered all missing printers.
NOTE You do not have to populate the Device User-Defined Fields. They will automatically update each month with data from the XML import.
For general information on installing Devices, refer to Adding and editing devices.


